Will Your 3D-Printed QR Code Scan? Size, Contrast and Layer Checks
A 3D-printed QR code is only useful if a phone can read it, and almost every failure can be predicted before you print. This guide walks through the tool's Scan check line by line, gives you the module-size and contrast numbers behind it, and ends with a five-step phone test for the first print.
What a phone is actually looking for
A phone camera reads a QR code in three moves. It finds the three large squares in the corners, uses them to work out the size and angle of the grid, and then decides for each small square, called a module, whether it is dark or light. Everything in this guide makes that last decision easier.
On a screen the decision is easy. On a 3D print the modules are physical bumps of plastic with edges rounded by the nozzle, and the light that falls on them casts tiny shadows. A code that looks perfect in the preview can still fail on the table, which is why the tool checks the physical numbers for you.
The Scan check, line by line
The Scan check sits under the style and color controls in the tool and updates every time you change the link, the size, the relief height or a color. It runs three kinds of verdict: green means fine, blue is a note to read, and red is a problem to fix before printing. If any line is red, the download buttons ask you to confirm before they save a file.
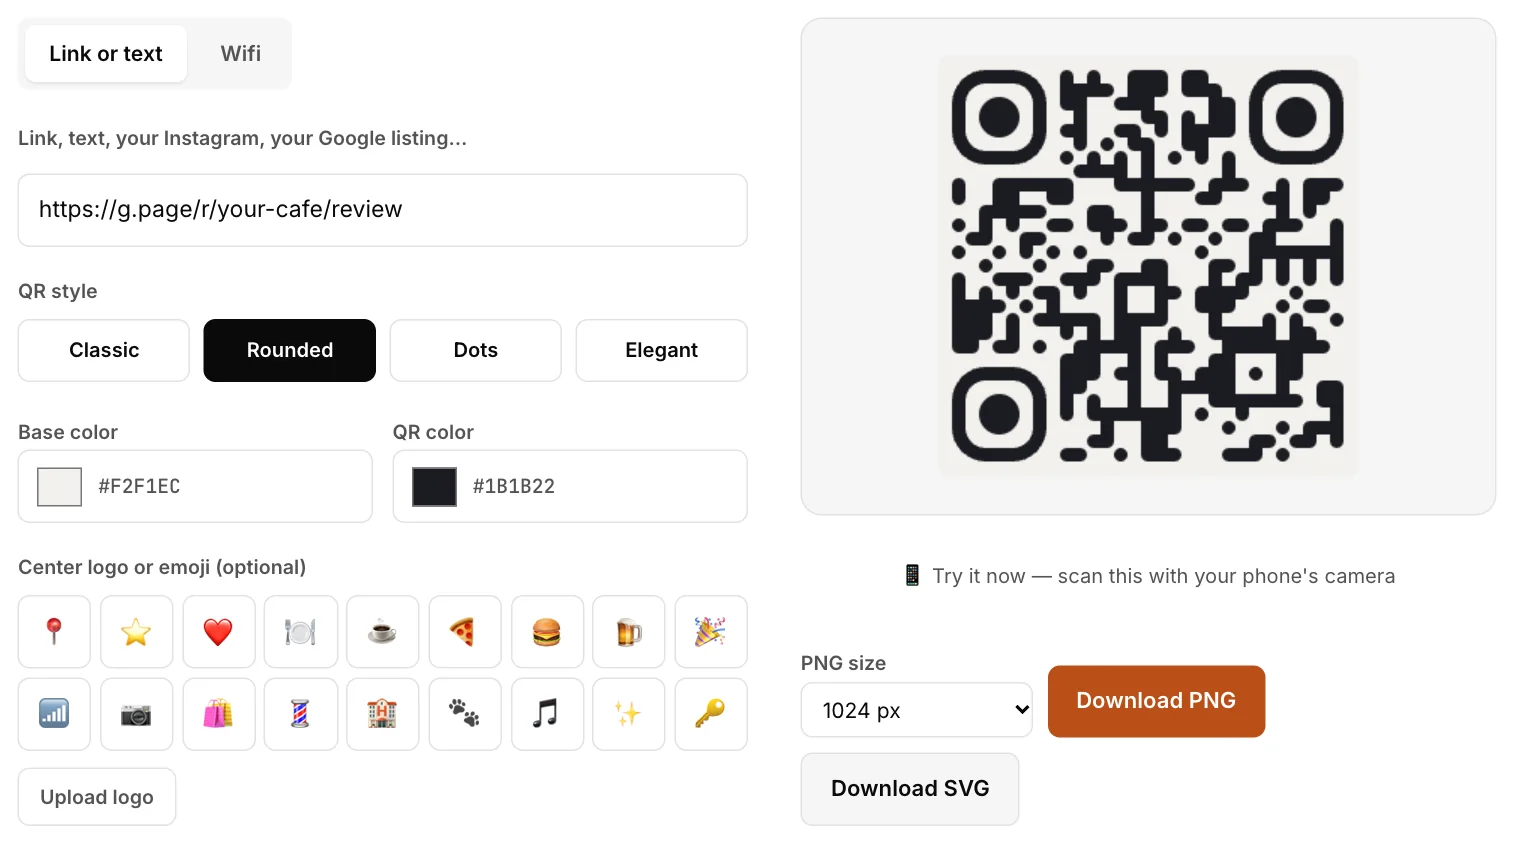
A clean result
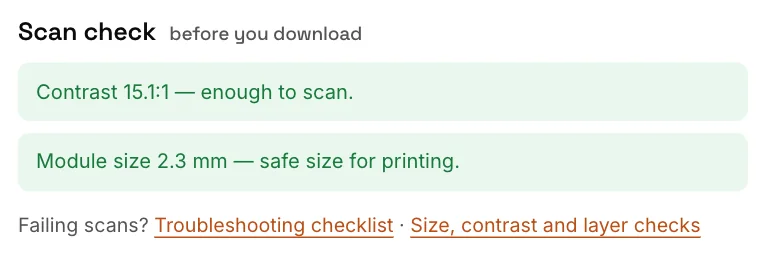
Contrast 15.1:1. The tool converts both colors to relative luminance, the same lightness measure used in web accessibility, and divides: (lighter + 0.05) / (darker + 0.05). Off-white #F2F1EC has a luminance of about 0.88 and near-black #1B1B22 about 0.01, which gives 15.1:1. A phone looks at lightness, not hue, so this ratio predicts how clearly it can separate dark modules from the light base. The tool turns green at 4.5:1 and above.
Module size 2.3 mm. A module is one little square of the code. Its physical size is the width of the code divided by the number of modules, and in this tool it is set by the size you pick: Small 1.7 mm, Medium 2.3 mm, Large 3.0 mm. Below 1.5 mm the line turns red, and from 1.5 to 1.9 mm it turns blue. At 2.3 mm a 0.4 mm nozzle has room to draw each square cleanly.
A result with problems
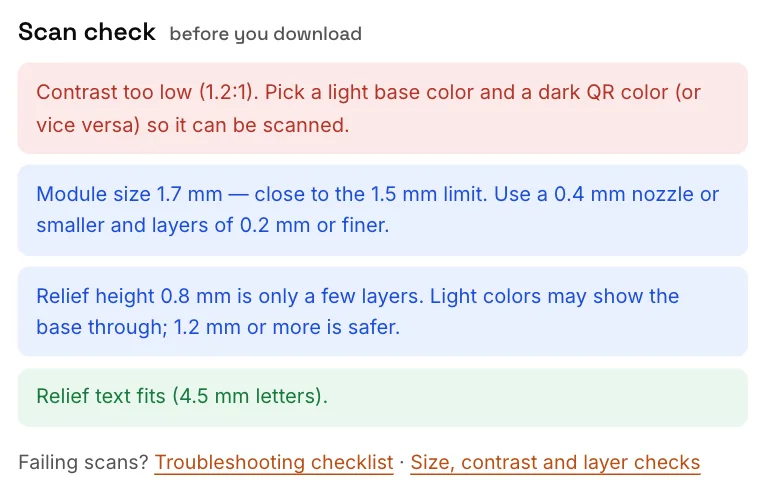
- Red, "Contrast too low (1.2:1)". The two colors have almost the same lightness, so the camera cannot tell the code from the base. Change one color until the ratio is at least 3:1, and aim for 4.5:1 or more. Make one color clearly light and the other clearly dark.
- Blue, "Module size 1.7 mm, close to the 1.5 mm limit". This is the Small size. It can print, but it leaves little room for nozzle rounding. Use a 0.4 mm nozzle or smaller with layers of 0.2 mm or finer, or switch to Medium.
- Blue, "Relief height 0.8 mm is only a few layers". At 0.2 mm layers that is four layers, and a light filament can let the base show through. Pick 1.2 mm (the default) or more.
- Green, "Relief text fits (4.5 mm letters)". If you add a line of raised text, the tool aims for letters min(text band minus 2, 6) mm tall, which is 4.5 mm on a keychain. It shrinks the text when it is wider than the object, warns in blue when it does, and turns red below 3 mm letters.
| Line | What it measures | Thresholds | What to do |
|---|---|---|---|
| Contrast | WCAG luminance ratio between base color and QR color | Red below 3:1, blue 3 to 4.5:1, green 4.5:1 and above | Widen the lightness gap between the two colors |
| Inverted code | Whether the QR color is lighter than the base | Blue note when contrast is at least 3:1 but the code is the lighter color | Prefer a dark code on a light base; test on an older phone if you keep it inverted |
| Module size | Millimeters per module | Red below 1.5 mm, blue below 1.9 mm, green above | Choose a larger size or a shorter link |
| Relief height | How tall the raised code is | Blue note below 1.0 mm (the 0.8 mm option) | Use 1.2 mm or more |
| Relief text | Letter height after fitting the text to the object | Blue if shrunk, red below 3 mm letters | Shorten the text (24 characters maximum) or pick a larger size |
| Object size | Largest side of the finished object | Blue above 180 mm, red above 250 mm | Choose a smaller size or a shorter link |
| Center logo | Whether a logo or emoji covers part of the code | Blue note; error correction switches to level H | Test-scan before printing in bulk |
Contrast: what the ratio looks like on real colors
A phone does not see color the way you do. It converts the image to shades of gray, so two colors with different hues but similar lightness, such as red and green, can look almost identical to the scanner. The figure shows five pairs, their calculated ratios and the verdict the Scan check would give.
Two things are worth noticing. The red and green pair has completely different hues but scores only 1.1:1, because the two colors are about equally light. And the yellow on white pair looks vivid on screen yet fails at 1.4:1. Sea green on white lands at 4.2:1, just under the 4.5:1 mark, so it gets a blue "borderline" line. The tool says that filament colors often look closer once printed, so treat a blue contrast line as a reason to do a test scan, not as a pass.
The tool also tells you when the code is lighter than the base. Those inverted codes (for example the off-white and near-black pair swapped) calculate to the same 15.1:1, and most modern phones read them, but some older scanners do not. Finish matters as much as color: silk, metallic, glitter and translucent filaments reflect or scatter light, so a matte filament in both colors gives the camera a stable image.
Module size: from link length to millimeters
Every QR code is a square grid. A version 1 code has 21 modules per side, and each larger version adds 4 (25, 29, 33, 37 and so on). The longer the link, the more modules you need. Because the tool fixes the size of each module, a longer link makes the object bigger instead of squeezing the squares. The width of the code is simply modules multiplied by module size.
| Modules per side | Link length it holds (level M) | Small, 1.7 mm | Medium, 2.3 mm | Large, 3.0 mm |
|---|---|---|---|---|
| 21 | Up to about 14 characters | 35.7 mm | 48.3 mm | 63.0 mm |
| 25 | Up to about 26 characters | 42.5 mm | 57.5 mm | 75.0 mm |
| 29 | Up to about 42 characters | 49.3 mm | 66.7 mm | 87.0 mm |
| 33 | Up to about 62 characters (a typical Wi-Fi code) | 56.1 mm | 75.9 mm | 99.0 mm |
| 37 | Up to about 84 characters | 62.9 mm | 85.1 mm | 111.0 mm |
How to read the table: find the row for your link length, then pick the column that fits your object. The width is the code alone. The finished object adds a margin (4 mm per side on the stand and keychain, 5 mm on the wall plaque) plus a band for the hole and for any raised text. A 25-module code at Medium is 57.5 mm wide, so a keychain built around it is wider still. The "link length" column assumes plain text in byte mode at error correction level M. With a center logo or emoji the tool switches to level H, which holds fewer characters per grid, so the same link usually lands one or two versions higher.
Two practical rules follow from the table. First, shorten the link before you enlarge the object: remove tracking parameters, avoid long folder paths, and better still point the code at a short page on your own domain that redirects to wherever you like. A printed code can never be edited, but a page you control can always change its destination. Second, the Small size is where blue notes begin. It is fine when you want a compact keychain, but it is the first place a weak printer shows its limits.
Nozzle and layer height against module size
A 0.4 mm nozzle lays down a line of roughly 0.4 to 0.5 mm wide. Dividing the module size by the line width tells you how many passes of plastic make up one module. This is simple arithmetic, not a measured result, but it shows why 1.5 mm is a sensible floor and why the tool recommends a nozzle of 0.4 mm or smaller.
| Module size | 0.4 mm lines | 0.45 mm lines | 0.6 mm lines (larger nozzle) |
|---|---|---|---|
| Small, 1.7 mm | 4.3 | 3.8 | 2.8 |
| Medium, 2.3 mm | 5.8 | 5.1 | 3.8 |
| Large, 3.0 mm | 7.5 | 6.7 | 5.0 |
| 1.5 mm (the tool's red limit) | 3.8 | 3.3 | 2.5 |
At Small with a 0.45 mm line you have fewer than four passes per module, and corners start to round. A 0.6 mm nozzle leaves under three passes at Small, so the tool's advice to stay at 0.4 mm or below makes sense. Medium and Large give the slicer much more room.
Relief height and layer count
The dark modules stand up from a flat base like tiny pillars. The relief you choose divided by your layer height gives the number of layers that make the raised code. Layer height also has to divide your base thickness cleanly if you plan a manual color change (see the two-color guide).
| Relief height | 0.20 mm layers | 0.16 mm layers | 0.12 mm layers |
|---|---|---|---|
| 0.8 mm | 4 | 5 | 6.7 |
| 1.2 mm (default) | 6 | 7.5 | 10 |
| 1.6 mm | 8 | 10 | 13.3 |
| 2.0 mm | 10 | 12.5 | 16.7 |
With 0.2 mm layers all four relief options come out as whole layers. With 0.16 mm layers only 0.8 and 1.6 mm do, so the slicer rounds the 1.2 mm default up or down by half a layer. That is harmless, but it is a reason to keep 0.2 mm layers unless you have a reason to go finer. The tool also lets the relief sink 0.15 mm into the base so the two parts fuse.
The 3.0 mm keychain base is 15 layers at 0.2 mm (3.2 mm for the wall plaque is 16), so with a 0.2 mm first layer the base ends exactly on a layer boundary. Keep the printer basics in order as well: print the code facing up and flat on the bed, keep filament dry, tune retraction so thin strings do not stretch between modules, and make sure the first layer sticks, because a corner that lifts warps the whole grid.
The quiet zone
The quiet zone is the empty margin around the code. The QR standard asks for four modules of it, and the diagram shows what that looks like. Without it, the camera cannot tell where the code ends and the background begins.
The tool builds that margin into the base. On the table stand and keychain the base extends 4 mm beyond the code on each side, and on the wall plaque 5 mm. Measured in modules that is:
| Format and margin | Small, 1.7 mm | Medium, 2.3 mm | Large, 3.0 mm |
|---|---|---|---|
| Stand or keychain, 4 mm | 2.4 modules | 1.7 modules | 1.3 modules |
| Wall plaque, 5 mm | 2.9 modules | 2.2 modules | 1.7 modules |
All of these are shorter than the four-module standard. In practice scanners often tolerate a shorter margin when the code sits on a plain, even surface, and the plate itself is a uniform light color, but the margin is the first thing to suspect if a scan is slow or fails only near the edges. Keep that margin plain: no text, borders, stickers or a decorative frame in it, and think about what the object will sit on or be fixed to. A pale plaque screwed onto a dark patterned surface behaves very differently from the same plaque on a clean white wall.
Error correction and logos
QR codes carry built-in redundancy so that a damaged code can still be read. There are four levels, which recover roughly 7 percent (L), 15 percent (M), 25 percent (Q) and 30 percent (H) of the data. Higher levels need more modules for the same link, so the code gets denser or the object gets bigger.
The tool uses level M normally and switches to level H when you add a logo or emoji in the center, because the logo covers part of the pattern. Keep the logo modest in size. A large logo uses up the safety margin that is meant for scuffs and print flaws, and the Scan check adds a blue reminder to test-scan.
Worked example: one review link, two objects
Example, with calculated numbers only: a café wants customers to leave a Google review. The link in the tool's example field is https://g.page/r/your-cafe/review, which is 33 characters. A real review link can be longer, which is one more reason to route it through a short redirect on your own domain. According to the table above, 33 characters at level M needs 29 modules (it exceeds the 26 characters a 25-module grid holds, and fits within the 42 of a 29-module grid). The colors are #F2F1EC and #1B1B22, a 15.1:1 contrast, so the contrast line is green.
| Small keychain | Medium table stand | |
|---|---|---|
| Module size | 1.7 mm | 2.3 mm |
| QR width (29 × module) | 49.3 mm | 66.7 mm |
| Base margin | 4 mm per side | 4 mm per side |
| Other bands | 9 mm hole band at the top | none (an 8 mm text band if you add text) |
| Finished size | 57.3 × 66.3 mm, 4.2 mm tall | 82.7 × 68.6 mm, about 58.6 mm tall at the back (59.8 mm with the raised QR) |
| Scan check | Contrast green; module size blue (1.7 mm) | Contrast green; module size green (2.3 mm) |
| Rule-of-thumb reach (width in mm = distance in cm) | about 49 cm | about 67 cm |
The keychain footprint is the QR width plus two margins (49.3 + 8 = 57.3 mm) by the QR width plus two margins plus the 9 mm hole band (49.3 + 8 + 9 = 66.3 mm). Its height is the 3.0 mm base plus the 1.2 mm relief. Adding a line of raised text would add the 6.5 mm text band, making it 72.8 mm deep. The stand is wider because the wedge adds a further 4 mm of base on each side, and its height comes from the 38° slope, the 5 mm front lip and the 6 mm of extra depth at the back.
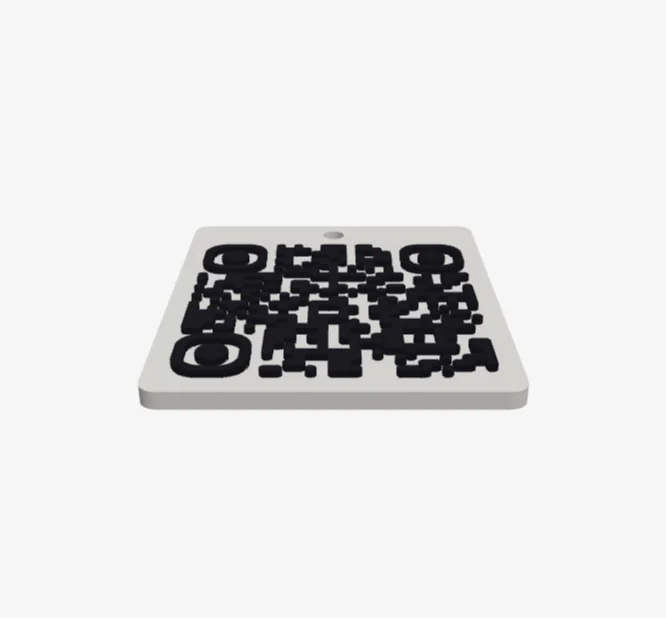
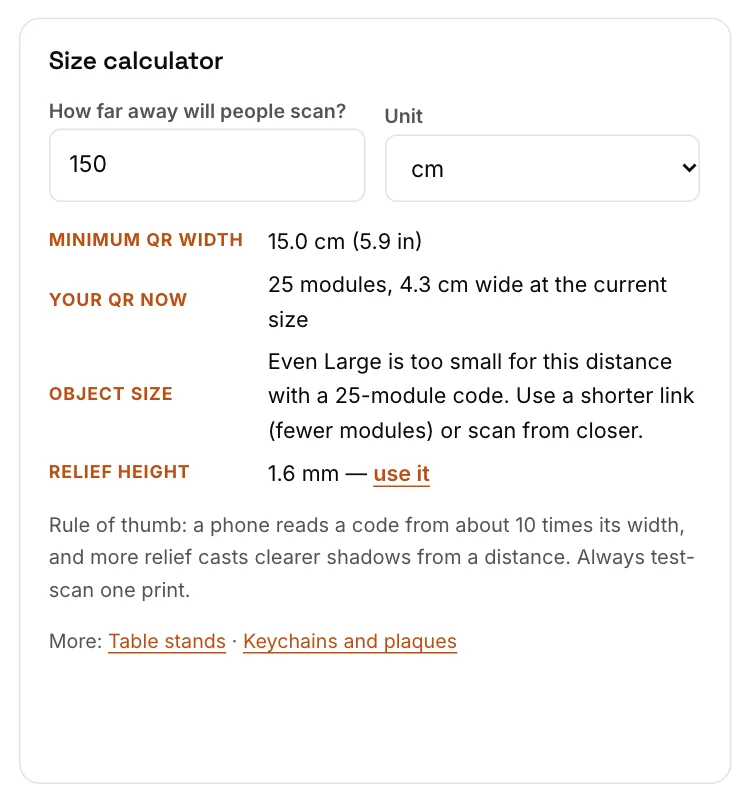
Which one is right depends on how far away the phone will be. Suppose the café's table stand is scanned from about 60 cm (an assumption for this example). The calculator needs a code at least 60 mm wide, and the 29-module grid needs at least 29 × 1.5 = 43.5 mm anyway, so the larger of the two, 60 mm, applies. Small gives 49.3 mm, which falls short, and Medium gives 66.7 mm, which passes, so Medium is the smallest size that works. The relief suggestion for anything within 100 cm is 1.2 mm, the default. A keychain held about 30 cm away needs only 43.5 mm, so the Small keychain passes. The calculator is the quickest way to run this check for your own numbers.
A five-step phone test for the first print
Scan the on-screen preview before you download anything. If the preview will not scan, the problem is the link or the colors, not the printer. Once it scans, print one object at the real size and run these five steps.
- Scan at the planned distance. Hold the phone flat and square to the code at the distance people will use. The size calculator's rule is width in millimeters equals distance in centimeters, so a 57.5 mm code should read from about 57 cm. Note the farthest distance that still works.
- Check close up and a bit too far. Move to roughly 15 cm, then to about 1.5 times the planned distance. A code that only works in a narrow band of distances is marginal.
- Change the light. Scan in the real lighting: bright overhead light, a dim corner and light coming from one side. Side light makes raised modules cast shadows, which usually helps, while a glossy surface under a lamp can wash the code out.
- Tilt the phone. Try roughly 30 to 45 degrees left, right, up and down. For a table stand, scan while seated and while standing.
- Try two phones and two apps. Use a recent phone and an older one if you can, plus the built-in camera and one other scanner app. Open the final link on mobile data to confirm the page loads quickly.
| Where it fails | Change first |
|---|---|
| Only works up close | Use a larger size (Small to Medium to Large) or a shorter link, then check the size calculator |
| Fails in dim or side light | Raise the relief (1.6 or 2.0 mm) and widen the contrast gap |
| Fails under a lamp or window glare | Switch to matte filament and tilt the object away from the light source |
| Fails when tilted | Make the code larger and keep the margin around it clear |
| Works on one phone only | Use a dark code on a light base, check for an inverted-code note and raise the contrast above 4.5:1 |
| Fails everywhere | Re-scan the preview, then follow Why a 3D-printed QR code won't scan |
If you change the size or the link, run the Scan check again and print another test piece before a batch. The failure table above only suggests the first thing to try; the troubleshooting guide covers fusing, warping and color-change problems in more depth.
Before you start a batch
- The preview scans on your phone.
- The Scan check shows no red line, and you have read every blue note.
- The contrast is at least 4.5:1, with a light base and a dark code, both in matte filament.
- The module size is 1.9 mm or more, or you have a 0.4 mm nozzle and 0.2 mm layers for Small.
- The margin around the code is clear of text and decoration.
- The link points to a page you control and loads quickly on mobile data.
- One test print scans on at least two different phones.
Frequently asked questions
What is the smallest 3D-printed QR code that will scan?
On a 0.4 mm nozzle the tool flags modules below 1.5 mm in red and modules from 1.5 to 1.9 mm with a blue caution. The Small size is 1.7 mm per module, so it prints but sits close to the limit; Medium (2.3 mm) is the comfortable choice. Always test-scan one print.
Should the code be dark on light or light on dark?
Dark on light is the safer choice. Inverted codes are read by many modern phones, but older apps and some scanners do not support them.
Can I change the link after printing?
No, the link is part of the pattern. Point the code at a short page you control and change where that page leads whenever you need to.
How far away can a phone scan my printed code?
A common rule of thumb is about ten times the width of the code, so a 57.5 mm wide code (25 modules at the Medium size) is a fair bet up to roughly 57 cm. The size calculator applies this rule. Treat it as a starting point and test-scan one print.
Try it in the tool
Put this guide into practice with these free tools and ready-made starting points:
Make your own 3D QR code
Open the tool, check the module size and contrast messages, and scan the preview on your phone before you download a file.
Open the free tool