QR Keychains and Wall Plaques: Sizes, Holes and Mounting
Keychains and wall plaques are the two flat formats in 3D QR Generator: a small plate you carry and a larger plate you screw to a wall. This guide gives the exact sizes the tool produces for each module count, shows where the holes go, walks through a wifi plaque for a vacation rental, and explains how to mount a plaque without cracking it.
How the tool sizes a flat plate
Both formats use the same arithmetic. The QR width is the number of modules (the small squares of the code) times the module size: 1.7 mm for Small, 2.3 mm for Medium, 3.0 mm for Large. The tool then adds a margin on every side and a band for the hole. Three formulas cover every size in this guide:
- Width = QR width + 2 × margin
- Depth = QR width + 2 × margin + hole band (+ text band, only if you type relief text)
- Height = base thickness + relief height. The relief is 1.2 mm unless you choose 0.8, 1.6 or 2.0 mm.
| Keychain | Wall plaque | |
|---|---|---|
| Base thickness | 3.0 mm | 3.2 mm |
| Margin around the code | 4 mm | 5 mm |
| Hole band (extra depth) | 9 mm | 8 mm |
| Text band (extra depth, only with relief text) | 6.5 mm | 7 mm |
| Holes | One, 4.2 mm across, centered, center 5.2 mm from the top edge | Two, 3.6 mm across, centers 6 mm from the top edge and 6 mm from each side edge |
| Relief letter height | 4.5 mm | 5 mm |
| Size loaded by its template | Small (1.7 mm) | Medium (2.3 mm) |
Example: a keychain for a 25-module link at Small. The code is 25 × 1.7 = 42.5 mm wide. Width is 42.5 + 8 = 50.5 mm, depth is 50.5 + 9 = 59.5 mm, and the finished piece is 3.0 + 1.2 = 4.2 mm thick. Every figure below comes from these same formulas.
Keychain sizes by module count
The module count depends on what the code holds. A short link is usually 21 to 25 modules, a medium link 29, and longer content 33 or more. The tool shows the real count for your content in the Size calculator, so use this table to see what a given count means in millimeters.
| Size | Modules | QR width | Width × depth, no text | Depth with relief text |
|---|---|---|---|---|
| Small (1.7 mm) | 21 | 35.7 | 43.7 × 52.7 | 59.2 |
| 25 | 42.5 | 50.5 × 59.5 | 66.0 | |
| 29 | 49.3 | 57.3 × 66.3 | 72.8 | |
| 33 | 56.1 | 64.1 × 73.1 | 79.6 | |
| Medium (2.3 mm) | 21 | 48.3 | 56.3 × 65.3 | 71.8 |
| 25 | 57.5 | 65.5 × 74.5 | 81.0 | |
| 29 | 66.7 | 74.7 × 83.7 | 90.2 | |
| 33 | 75.9 | 83.9 × 92.9 | 99.4 |
A Small 25-module keychain (50.5 × 59.5 mm) is smaller than a credit card in both directions, while a Medium 33-module one (83.9 × 92.9 mm) is palm-sized, so for a key ring stay on Small. Each step up in module count adds four modules, or 6.8 mm per direction at Small and 9.2 mm at Medium, which makes a shorter link the most effective way to shrink the plate. Small is also the floor: at 1.7 mm the scan check shows a blue note (modules under 1.9 mm call for a 0.4 mm nozzle or finer and layers of 0.2 mm or less), and modules under 1.5 mm are flagged red.
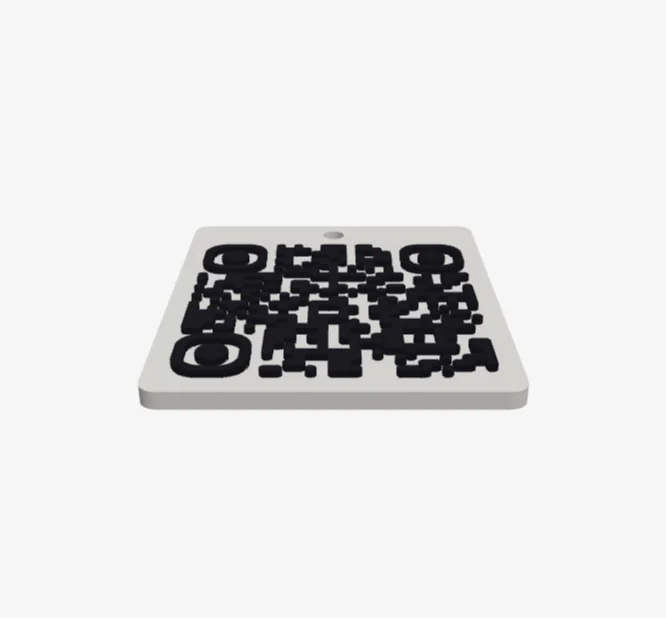
In the preview, check that the hole sits clear of the code with plain plate around it. Note the proportions too: 3.0 mm of base under 1.2 mm of relief. The corners are rounded with a radius of 6% of the shorter side, about 3 mm on this keychain.
The ring hole: where it sits and how much plastic is left
The hole is a plain through-hole 4.2 mm across, centered side to side, with its center 5.2 mm from the top edge. The measurements in the diagram are for the Small 25-module keychain, and the hole position is the same on every size.
The hole edge starts 5.2 − 2.1 = 3.1 mm from the plate edge, which is roughly eight lines of a 0.4 mm nozzle. That narrow strip carries the pull of the ring, so it is the part to protect. The 5.7 mm of plain plate between the hole and the code keeps a ring from rubbing on the raised modules.
- Leave the geometry alone. Enlarging the hole in a slicer or modeling app thins the 3.1 mm strip. For a bigger opening, thread a cord or larger clip through the existing hole.
- Print flat, as exported. The layers then run across the plate, which is typically the stronger direction for a ring pulling on the hole.
- Consider PETG for keys. PLA is stiff and can snap under a sharp pull; PETG usually tolerates more flex. Neither is a guarantee, so test a piece with your own ring. A split ring of wire roughly 1 to 2 mm thick should pass through 4.2 mm; a thick cord or heavy clip may not.
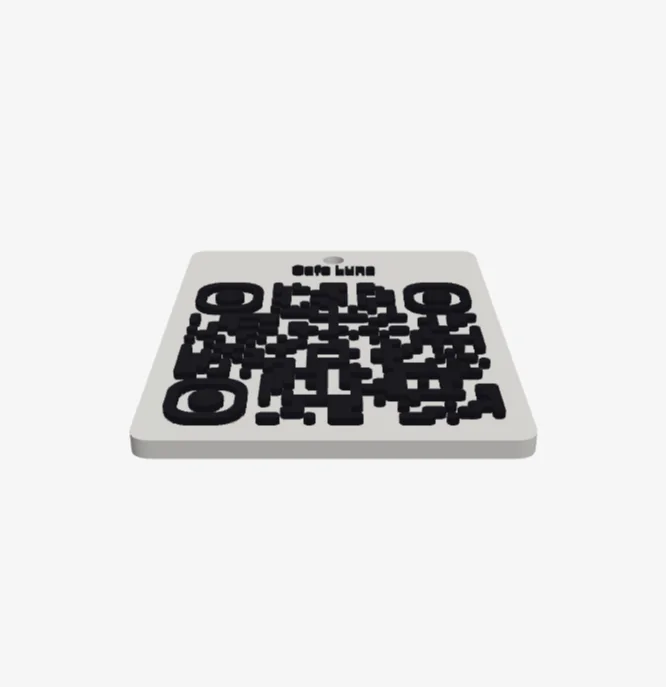
Relief text needs a heads-up. You can type up to 24 characters, and the tool lengthens the plate by the 6.5 mm text band (Small 25 goes from 59.5 to 66.0 mm). Letters are 4.5 mm tall and shrink if the text is wider than the plate minus 6 mm (44.5 mm here); the scan check warns in blue when it shrinks them and in red below 3 mm. Keep names short, and check the 3D preview to confirm the lettering does not run into the hole. The text is centered in that band, between the ring hole (or the two plaque holes) and the QR code, so it never lands on a hole.
Everyday use and event batches
A keychain lives in a pocket or a bag, so expect the raised code to scuff over time. The default relief is 1.2 mm; a taller relief (up to 2.0 mm) is easier to see but catches more on pocket linings, so there is no perfect setting. Link to a page you control, because the printed code cannot change, and keep spares. A lost-and-found tag should link to a message or contact form, never a home address, since anyone who finds it can scan it.
For a wedding, conference or fair batch:
- Pick the destination first and make sure the page stays online as long as guests may keep the keychain.
- Print one test piece and scan it on two phones before starting the batch.
- Plan for the guest count plus about 10 percent for gifts and mistakes.
- Before packing, trim stringing from the ring hole and push a split ring through every piece. A keychain that cannot take a ring is a wasted print.
Wall plaque sizes by module count
The plaque has a 3.2 mm base, a 5 mm margin and two holes at the top, so the default height is 3.2 + 1.2 = 4.4 mm. The last column is the one to use on the wall: the holes sit 6 mm in from each side, so their spacing is always the plate width − 12 mm.
| Size | Modules | QR width | Width × depth, no text | Depth with relief text | Hole spacing, center to center |
|---|---|---|---|---|---|
| Medium (2.3 mm) | 21 | 48.3 | 58.3 × 66.3 | 73.3 | 46.3 |
| 25 | 57.5 | 67.5 × 75.5 | 82.5 | 55.5 | |
| 29 | 66.7 | 76.7 × 84.7 | 91.7 | 64.7 | |
| 33 | 75.9 | 85.9 × 93.9 | 100.9 | 73.9 | |
| Large (3.0 mm) | 21 | 63.0 | 73.0 × 81.0 | 88.0 | 61.0 |
| 25 | 75.0 | 85.0 × 93.0 | 100.0 | 73.0 | |
| 29 | 87.0 | 97.0 × 105.0 | 112.0 | 85.0 | |
| 33 | 99.0 | 109.0 × 117.0 | 124.0 | 97.0 |
Medium covers most plaques. The tool's rule of thumb is that the QR width in millimeters should be at least the scanning distance in centimeters, and never less than the module count × 1.5 mm. By that rule a 75.9 mm code suits scanning from about 75 cm or closer, and a 99 mm code from about 1 m. Enter your own distance in the Size calculator. Even the largest plaque here is far below the 180 mm at which the tool warns about small printer beds.
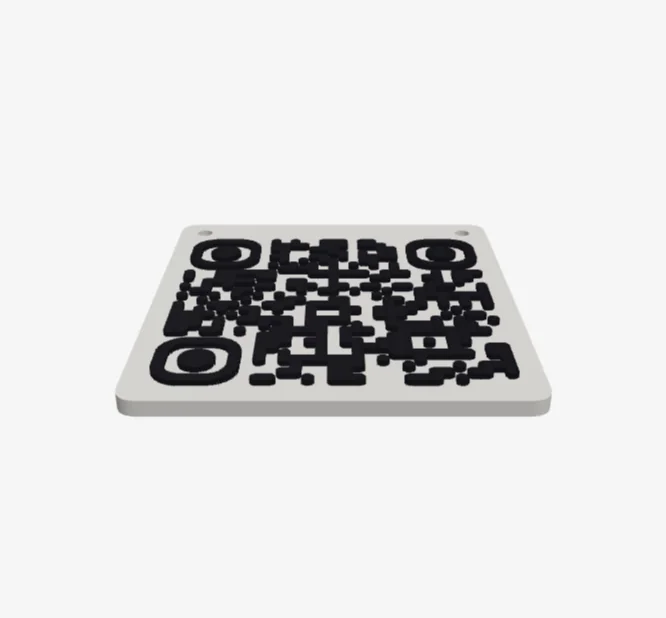
The diagram shows the Medium 33-module plaque, the size a typical wifi code produces.
The diagram also shows the room for fasteners. Each hole edge is 6 − 1.8 = 4.2 mm from the nearest plate edge, and each hole center is 7 mm above the top of the code (13 mm band minus 6 mm), so screw heads up to roughly 10 mm across stay clear of the code.
Case study: a wifi plaque for a vacation rental
This is a worked example, not a customer story. Imagine a lakeside cabin rental called Cedar Lodge. The owner is tired of texting the wifi password to every guest and wants a plaque by the door that joins the network when a phone scans it.
- Create a guest network on the router. Name it something guests will recognize, such as Cedar Lodge Guest, with a password you use nowhere else. Many routers can isolate guest devices from your own; check the router's documentation.
- Load the template. Open the wifi plaque template and use its button. The tool opens in Wall plaque format, Medium size, Wifi mode, 1.2 mm relief.
- Enter the network. Fill in the name and password, set the security type (WPA is the usual choice for a password-protected home network), and tick hidden only if the name is hidden.
- Read the size and add a label. The Size calculator shows the module count and width; compare it with the plaque table. A relief line such as Guest wifi tells guests what the code is for.
- Check, print, test. Fix anything red in the scan check, print, and scan the finished plaque on two phones before screwing it to the wall.
What is stored in the code
A wifi code holds text, not a link. For the example network with the password Loon;Kayak:2026, the tool generates:
WIFI:T:WPA;S:Cedar Lodge Guest;P:Loon\;Kayak\:2026;;
| Part | Meaning | In the example |
|---|---|---|
WIFI: | Tells the phone this is network login data | WIFI: |
T: | Security type: WPA, WEP or nopass | T:WPA; |
S: | Network name (SSID) | S:Cedar Lodge Guest; |
P: | Password (left out for an open network) | P:Loon\;Kayak\:2026; |
H:true; | Added only if you tick the hidden-network box | Not used |
; | Final semicolon that closes the string | ; |
Which characters get escaped
Semicolons and colons are separators, so a password containing them would be misread. The tool puts a backslash in front of five characters in the name and password. You type normally and never add backslashes yourself.
| You type | Stored as | Why |
|---|---|---|
\ (backslash) | \\ | The escape character itself |
; (semicolon) | \; | Separates the fields |
, (comma) | \, | Reserved by the wifi format |
: (colon) | \: | Separates a field name from its value |
" (double quote) | \" | Reserved by the wifi format |
Other punctuation (hyphens, underscores, !, # and spaces inside a name) is stored as typed. Two details: the tool trims spaces from both ends of the network name but not the password, so an accidental trailing space in a password stays in the code; and accented letters usually take more than one byte each, which can push the code up a size.
Why wifi codes usually land around 33 modules
The format costs 18 characters before you add anything: WIFI:T:WPA;S: is 13, ;P: is 3 and the closing ;; is 2. The name and password come on top, and each escaped character counts twice. Standard QR capacities at the tool's normal error-correction level (M) are about 14 bytes for 21 modules, 26 for 25, 42 for 29, 62 for 33 and 84 for 37, which gives approximately these ranges:
| Network name + password (characters) | Approximate modules | Plaque at Medium (width × depth) |
|---|---|---|
| Up to about 8 | 25 | 67.5 × 75.5 mm |
| About 9 to 24 | 29 | 76.7 × 84.7 mm |
| About 25 to 44 | 33 | 85.9 × 93.9 mm |
| About 45 to 66 | 37 | 95.1 × 103.1 mm |
Ticking the hidden option adds 7 characters. A descriptive name of 15 to 20 characters plus a generated password of 12 to 20 is already 27 to 40, which is why 33 modules is the common result. The example string is 52 characters long, so it comes out at approximately 33 modules. These are estimates from standard QR capacities; the tool displays the actual module count for what you enter, and that number is the one to trust.
One trap: a logo or emoji in the center switches the code to the highest error-correction level (H), which holds far less. The same 52-character string would then need approximately 41 modules, a plaque about 104 mm wide at Medium. Leave the center empty on a wifi plaque.
Choosing the size
For the Cedar Lodge example at approximately 33 modules:
- Small: 33 × 1.7 = 56.1 mm code (66.1 mm plate width). By the tool's rule of thumb it scans from about 56 cm or closer.
- Medium: 33 × 2.3 = 75.9 mm code on an 85.9 × 93.9 × 4.4 mm plate (100.9 mm deep with relief text). The sensible pick for a plaque beside a door or on a fridge.
- Large: 99 mm code on a 109 × 117 mm plate. Worth it only if guests scan from across a room.
A shorter set-up, Lake House with the password sunny-days (38 characters in the code), comes out at approximately 29 modules and 76.7 × 84.7 mm at Medium. Still, never weaken a password just to save a few millimeters.
Privacy: the plaque shows the password
The password is stored in the code as plain text. Anyone who can scan the plaque can join the network, and any QR reader app can show the raw string, password included. That suits guests and does not suit strangers, so:
- Use a guest network, never your main one. Do not put on a plaque the password of the network your computers, cameras or door locks use.
- Hang it inside. A plaque on a porch or visible from the street invites scans from people who are not guests.
- Do not photograph it for the listing. A photo of the plaque carries the same information as the plaque.
- Plan to replace it. When the password changes, the old plaque stops working. A new one is one small print, roughly 30 g of PLA if printed solid at this size.
Mounting a wall plaque
| Option | Good for | Watch out for |
|---|---|---|
| Screws (with plugs in drywall or masonry) | Permanent installs in reception areas, shops and rentals | The holes are 3.6 mm and straight, with no countersink, so the screw head sits on top of the plate |
| Nails | Wood or soft walls where a screw is inconvenient | Many nail heads are smaller than 3.6 mm and pull through; hammering can crack the plate |
| Foam mounting tape | Smooth, clean walls and doors | Dust and texture weaken the bond; check the tape's weight rating |
| Removable adhesive strips | Rentals and temporary signs | Follow the rating and the wait time before hanging |
| Magnets or a backing plate | Fridge doors, metal frames, boards fixed to the wall | Magnets can shift, so use two or more |
For tape and strips, estimate the weight: an 85.9 × 93.9 × 3.2 mm base is about 25.8 cm³, and PLA is around 1.24 g/cm³, so a fully solid plate is about 32 g (less with infill). Pick a tape or strip rated well above that.
Which screw fits a 3.6 mm hole
- Fits with a little play: an M3 machine screw (3.0 mm) or a #4 wood or drywall screw (typically around 2.8 mm). A pan or round head is typically about 5.5 to 6 mm across, wider than the hole.
- Probably too tight: a #6 screw (typically around 3.5 mm) leaves about 0.1 mm of clearance and may catch on a printed hole.
- Add a washer if unsure. A small M3 washer is typically around 7 mm across, spreads the load and covers a nail head that is too small.
- Mark the wall from the plate. Hold the plaque level and mark through both holes with a pencil, or use the spacing from the table (73.9 mm for the Medium 33-module plaque). Printers vary slightly, so check against your own print.
How not to crack it
- Hand-drive the screws. Use a screwdriver, not a drill or impact driver, and stop when the head touches. Plastic tends to crack at a hole when overtightened.
- Do the hard work in the wall. Drill a pilot hole and use a plug in drywall or masonry so you never force the screw through the plate.
- Keep the plate flat. On an uneven wall, tightening bends the plate; add a washer or thin shim where it floats. Do not curve it around a pipe or post.
- Do not hammer. If you must use nails, drive them into wood first and stop short of the plate.
- Mind the heat. PLA can soften and warp near a heater, behind glass in strong sun or in a hot car. Use PETG or ASA there.
Hang a plaque at roughly chest or eye height in even light, with no mirror or window facing it. If it will not scan once installed, see Why a 3D-Printed QR Code Won't Scan.
Keychain, wall plaque or table stand?
The three formats share one QR generator and differ in shape, fixing method and print workflow. Example sizes use 25 modules for the keychain and stand and the 33-module wifi code for the plaque.
| Keychain | Wall plaque | Table stand | |
|---|---|---|---|
| Shape | Flat plate | Flat plate | Wedge tilted 38°, 5 mm front lip |
| Base thickness | 3.0 mm | 3.2 mm | 3.0 mm |
| Margin | 4 mm | 5 mm | 4 mm |
| Holes | One, 4.2 mm | Two, 3.6 mm | None |
| Text band | 6.5 mm | 7 mm | 8 mm |
| Example size (W × D × H) | Small 25: 50.5 × 59.5 × 4.2 mm | Medium 33: 85.9 × 93.9 × 4.4 mm | Medium 25: 73.5 × 61.4 × 53 mm |
| Scanned from | In the hand, close | Arm's length or more | Across a table |
| Two-color print | One color change, after the base | One color change, after the base | Colors alternate over many layers |
| Single-color printer | Pause at layer 15 (0.2 mm layers) | Pause at layer 16 (0.2 mm layers) | Not suitable: the code is tilted |
| Main risk | Scuffs and a cracked ring hole | Glare and a loose mount | Tipping, spills, wipe-downs |
Choose the keychain when the code must travel with a person, the plaque when information belongs to a place, and the table stand when people read it from a seat. The layer numbers assume a 0.2 mm first layer and 0.2 mm layers; the tool's Printer guide recalculates them for your layer height. See Two-Color 3D Printing for QR Codes for the full workflow.
Before you hand them out
- The code scans on two different phones, and the scan check shows no red items.
- The link goes to a page you control, or the wifi is a guest network.
- The ring hole or screw holes are clear of plastic films, and a ring or screw fits.
- Relief text, if any, does not run into a hole in the 3D preview.
- The plaque is mounted flat, facing the viewer, with screws snug rather than tight.
- You have spares for loss and damage. For help with size and contrast, see Will Your 3D-Printed QR Code Scan?
Frequently asked questions
How thick should a keychain be?
The keychain base is 3.0 mm thick and the code adds 1.2 mm by default, so the finished piece is about 4.2 mm. That is usually sturdy enough for everyday use. For rough handling, print it in PETG rather than trying to make it thicker.
Can I use a different hole size?
The tool has no hole-size setting: the keychain hole is 4.2 mm and the plaque holes are 3.6 mm. If you edit the file in a slicer or modeling app, keep at least about 3 mm of plastic between a hole and any edge, as the default keychain does (3.1 mm).
Does a wifi code work on every phone?
Recent versions of iOS and Android generally read wifi codes from the camera and offer to join. Older devices may need a scanner app, so keep the network name visible as relief text too.
Will the plaque survive outdoors?
PLA can warp in strong sun. For a porch or a garden gate, use PETG or ASA, and check the code regularly. A plaque outdoors also shows the wifi password to anyone passing by.
What screw fits the plaque's 3.6 mm holes?
An M3 machine screw (3.0 mm) or a #4 wood or drywall screw usually fits with a little play. A #6 is probably too tight. Choose a head wider than the hole, add a small washer if unsure, and tighten by hand until just snug.
Is it safe to put my wifi password in a QR code?
The password is stored in the code as plain text, so anyone who can scan the plaque can read it. Use a guest network, hang the plaque indoors, and replace it when you change the password.
Try it in the tool
Put this guide into practice with these free tools:
Make your own 3D QR code
Pick the keychain or wall plaque format, try wifi mode if you need it, and check the preview before you print.
Open the free tool