Two-Color 3D Printing for QR Codes: 3MF vs STL
A QR code needs two colors to scan reliably, and which file you download decides how much work the slicer does for you. This guide shows what is inside the 3MF and the STL zip that 3D QR Generator exports, which one to pick for your printer, and the exact layer where a one-spool printer has to change color on a keychain or a wall plaque.
Why a QR code needs two colors
A QR code works by contrast. If the base and the raised modules are printed in the same filament, the only difference the camera can use is shadow, and shadow changes every time the light moves. Two colors give you a difference that stays put.
The tool measures it as a WCAG contrast ratio between the base color and the QR color. Its Scan check shows red below 3:1, a blue “borderline” note from 3:1 to 4.5:1, and green from 4.5:1 up. A QR that is lighter than its base is treated as an inverted code, which some older phones fail to read. Pick the colors first, then pick the file.
The good news is that a QR object is a forgiving two-color job. All of the dark material sits on top of the base, so on a flat object there is one color change, at the layer where the modules begin.
What is inside each download
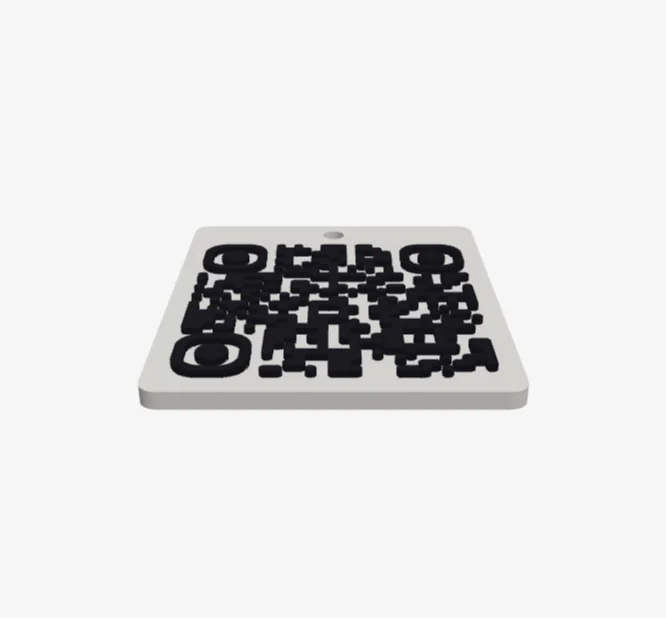
Both files are generated in your browser from the same geometry, so they are the same object. The difference is how much your slicer is told about it.
| 3MF | STL (ZIP) | |
|---|---|---|
| Files | One .3mf file | One .zip with base.stl, qr-code.stl and a README.txt |
| Pieces | Two separate objects: the base and the raised relief (QR plus any relief text) | The same two pieces, one per file |
| Colors | Each piece carries a display color: your base color and your QR color | None. STL stores triangles only |
| Units | Millimeters, stored in the file | Not stored. Slicers assume millimeters |
| Alignment | Both pieces keep their exact position relative to each other | Come out of the same coordinate system, so they line up when both are imported together |
| What you still do | Map each color to a real filament, or add one manual color change | Import both files as one model, then assign a filament to each part |
Two details are worth knowing. First, the relief is sunk 0.15 mm into the base so the two pieces fuse instead of touching along a hairline. In a multi-color slice that overlap is a tiny zone where one of the two colors has to win, so scrub the layer preview and confirm the dark color starts at the top of the base. Second, the colors in a 3MF are only a starting suggestion. You decide which spool goes with which piece.
Which one should you download?
| Your situation | Download | Why |
|---|---|---|
| Bambu printer with AMS, any format | 3MF | Bambu Studio and OrcaSlicer read the two pieces directly |
| Prusa with MMU, any format | 3MF | PrusaSlicer opens it and lets you pick an extruder per piece |
| One spool, keychain or wall plaque | 3MF | One piece of paperwork; you add a single color change at the layer from the table below |
| One spool, table stand | Neither alone | A single color change cannot work on the tilted face (see the diagram further down). Use paint, or the STL pair with the QR glued on |
| Cura, or a slicer that ignores 3MF colors | STL ZIP | You assign each file to an extruder yourself, so nothing depends on stored colors |
| You want to move, scale or rotate one piece on its own | STL ZIP | Two independent files are easier to treat separately (keep them aligned if you want to print them together) |
If you are unsure, start with the 3MF. If the slicer does not show two pieces, download the STL ZIP.
Three ways to print the two colors
Pick the tutorial that matches your printer: an automatic color change on a Bambu with AMS or a Prusa with MMU (all three formats), one manual filament change on a one-color printer (keychain and wall plaque only), or no change at all and a little paint. The tool's Printer guide shows the same steps, rewritten for your current format and colors.
Tutorial 1: Bambu Lab with AMS
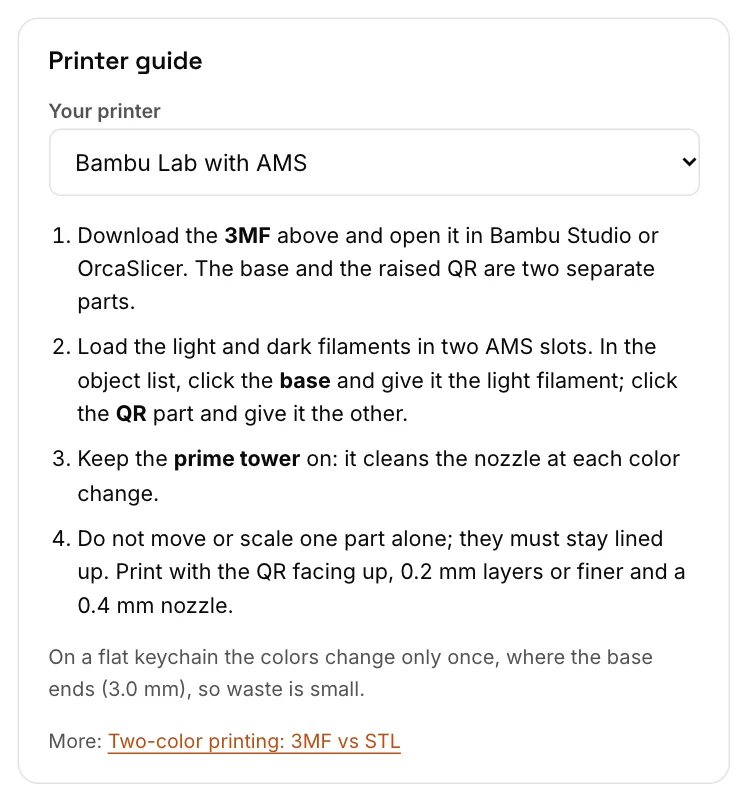
- Download the 3MF and open it in Bambu Studio or OrcaSlicer. The object list should show two entries: the base and the raised QR.
- Load the light and the dark filament into two AMS slots.
- In the object list, click the base and give it the light filament. Click the QR part and give it the dark one. The tool's Printer guide tells you which is which from your colors; the base should be the lighter.
- Keep the prime tower on. It cleans the nozzle at each color change.
- Select both pieces before you move anything, and never scale one alone. Print with the QR facing up, 0.2 mm layers or finer and a 0.4 mm nozzle.
- Slice and drag the layer slider. On a keychain the dark color should first appear just above 3.0 mm and nowhere below it. Check the estimated waste: a flat object should show very few color changes.
The table stand works on an AMS too, but its code sits on a 38° slope, so the two colors alternate on many layers. Expect more purge waste and a longer print than with the flat formats.
Tutorial 2: Prusa with MMU
- Download the 3MF and open it in PrusaSlicer. Depending on the version, the two pieces appear as two objects or as two parts of one object. Either is fine.
- Right-click the base and set its extruder. Do the same for the QR part with the other filament. On the MMU these are extruder 1 and extruder 2.
- Keep the wipe tower on. It purges the old color at each change.
- Select both pieces before you move anything, and never scale one alone. Print with the QR facing up, 0.2 mm layers or finer and a 0.4 mm nozzle.
- Check the preview: the second extruder should only print on top of the base, as raised modules (and relief text, if you added some).
With the STL ZIP, import base.stl and qr-code.stl together. If the slicer asks whether to load them as one object with several parts, say yes, then pick an extruder for each part.
Tutorial 3: One-color printer with a manual filament change
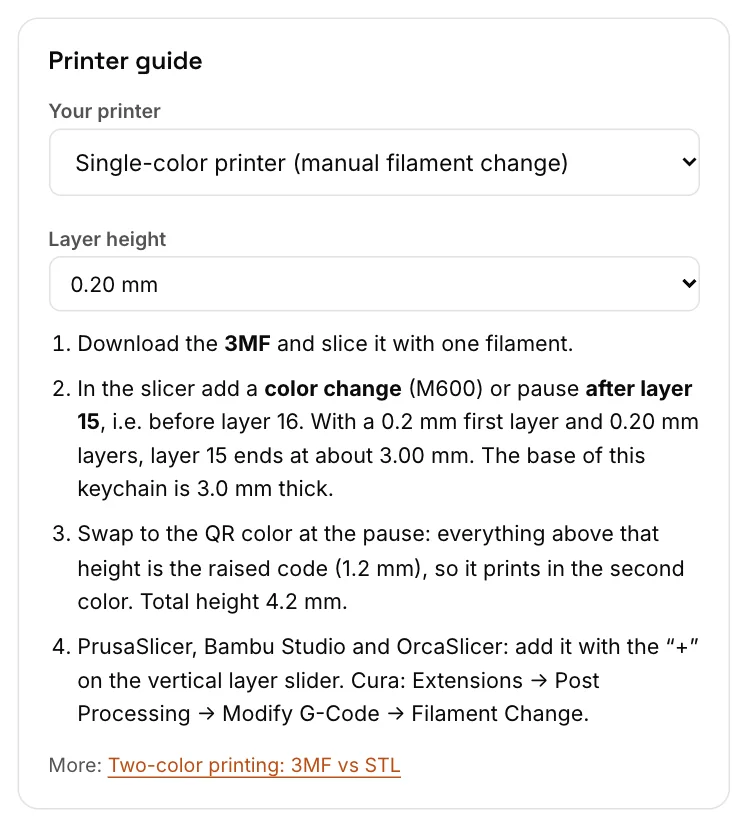
- Download the 3MF and slice it with one filament. Everything prints in the light color until the change.
- Look up your layer in the table below, or use the tool's Printer guide, which does the same math for your layer height.
- Add a color change (the G-code is M600) or a pause so that layer N is the last base layer. Some slicers insert the change at a layer, which prints that layer in the new color, so select layer N+1 there. In PrusaSlicer, Bambu Studio and OrcaSlicer, use the plus icon on the vertical layer slider. In Cura, use Extensions, Post Processing, Modify G-Code, then the Filament Change script.
- Check the preview: the first dark layer should contain only QR modules, and the top surface of the base should still be light.
- Start the print and stay near it. When the printer pauses, unload the light filament, load the dark one and push it through until the color runs clean. The first dark layer is the one everyone sees, so purge a little longer than you think you need.
- Resume. Everything above the change is the raised code.
Do not use this method on the table stand. The next two sections show why.
The exact layer for the color change
The tool uses one formula. With a first layer of 0.2 mm and a layer height h, the last base layer is
N = round((base thickness − 0.2) ÷ h) + 1, and that layer ends at Z = 0.2 + (N − 1) × h.
The base is 3.0 mm thick on the keychain and 3.2 mm on the wall plaque. Here is the result for every layer height the Printer guide offers:
| Layer height | Keychain (3.0 mm): N | Ends at | Off by | Plaque (3.2 mm): N | Ends at | Off by |
|---|---|---|---|---|---|---|
| 0.08 mm | 36 | 3.00 mm | exact | 39 | 3.24 mm | +0.04 (tie) |
| 0.12 mm | 24 | 2.96 mm | −0.04 | 26 | 3.20 mm | exact |
| 0.16 mm | 19 | 3.08 mm | +0.08 (tie) | 20 | 3.24 mm | +0.04 |
| 0.20 mm | 15 | 3.00 mm | exact | 16 | 3.20 mm | exact |
| 0.24 mm | 13 | 3.08 mm | +0.08 | 14 | 3.32 mm | +0.12 (tie) |
| 0.28 mm | 11 | 3.00 mm | exact | 12 | 3.28 mm | +0.08 |
“Off by” is how far layer N ends from the real base top. When it is not zero, the slicer has to round: it can never move the change by more than half a layer. A “tie” means two layers are equally close (for the keychain at 0.16 mm, layer 18 ends at 2.92 mm and layer 19 at 3.08 mm), so your slicer may choose either one. The result is a base that is a fraction of a millimeter short or tall, which is far less visible than a color change in the wrong place. If you want an exact result with no rounding, use 0.20 mm for either format, 0.28 mm or 0.08 mm for the keychain, or 0.12 mm for the plaque.
Worked example. A keychain with 25 modules at 0.16 mm layers: (3.0 − 0.2) ÷ 0.16 = 17.5, rounded to 18, plus 1 = layer 19, which ends at 0.2 + 18 × 0.16 = 3.08 mm. If your slicer uses a different first layer height, put that number in place of 0.2 and calculate again.
The change height depends only on the base. The relief you choose in the tool changes the number of dark layers and the total height:
| Relief height | Keychain total (3.0 + relief) | Plaque total (3.2 + relief) | Dark layers at 0.20 mm |
|---|---|---|---|
| 0.8 mm | 3.8 mm | 4.0 mm | 4 |
| 1.2 mm (default) | 4.2 mm | 4.4 mm | 6 |
| 1.6 mm | 4.6 mm | 4.8 mm | 8 |
| 2.0 mm | 5.0 mm | 5.2 mm | 10 |
The Size calculator suggests 1.2 mm up to 100 cm of scanning distance, 1.6 mm up to 300 cm and 2.0 mm beyond that. That is a rule of thumb: more relief casts a clearer shadow on top of the color contrast.
Layer numbering differs a little between slicers, and Cura's preview in particular can be off by one. Always confirm in the preview that the first dark layer shows only modules.
Why the table stand cannot use a single change
On the keychain and the plaque the QR sits on a flat top, so a horizontal color change is the right shape. On the table stand the code face is a ramp tilted 38°. A 57.5 mm code (25 modules at the Medium size) rises 35.4 mm along that ramp, so its modules span 35 mm of height instead of 1.2 mm. A single change at one height cuts straight through the ramp:
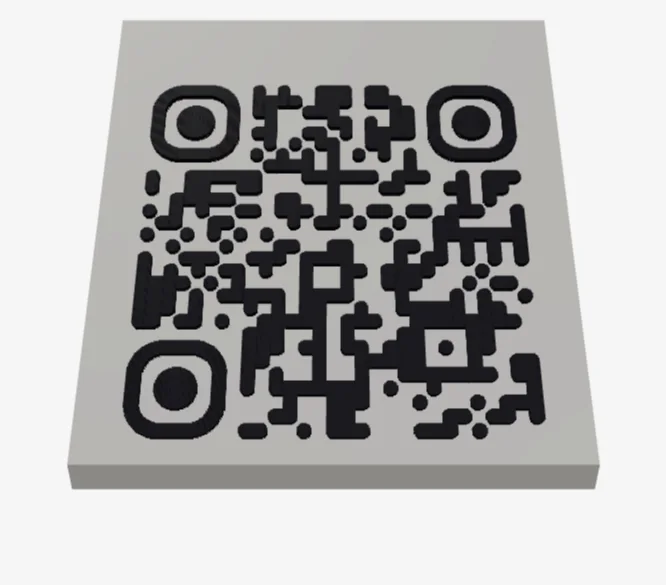
For a table stand, use a system that changes color on many layers (AMS or MMU), print in one color and paint the raised code, or print base.stl and qr-code.stl from the STL ZIP in two colors and glue the QR part onto the ramp.
No color change at all: one color plus paint
You can print the whole object in light filament and add the dark color afterward. Because the modules are raised, this behaves like a rubber stamp. Roll a thin film of matte acrylic paint onto a flat sheet, press the code face onto it lightly and lift it away. A paint pen also works on small areas, but it is slow on a dense code. Use matte paint in a thin coat, since thick paint rounds off the module edges, and scan a finished sample before you make more.
Colors that work
Printed filament looks different from a screen color, so treat these hex values as typical examples. Each ratio was calculated with the WCAG formula the Scan check uses; enter your own two colors in the tool to see your pair's number.
| Base (color A) | QR (color B) | Contrast | Scan check |
|---|---|---|---|
| White #FFFFFF | Black #111111 | 18.9:1 | Green |
| Off-white #F2F1EC | Near-black #1B1B22 (the tool's default) | 15.1:1 | Green |
| Yellow #F4C20D | Black #111111 | 11.3:1 | Green |
| White #FFFFFF | Navy #1F3A5F | 11.5:1 | Green |
| Light gray #D9D9D9 | Forest green #14532D | 6.5:1 | Green, with less margin |
| Red #C0392B | Black #111111 | 3.5:1 | Blue, borderline |
| Light gray #D9D9D9 | Mid gray #808080 | 2.8:1 | Red |
Reach for the first four pairs. The last three show what to avoid: a saturated mid-tone against black, and two mid-tones against each other. Keep the lighter color on the base, and prefer matte filament, since glossy or silk finishes usually reflect more light.
Common errors when you load the file
| What you see | Likely cause | Fix |
|---|---|---|
| The QR floats beside the base, or the code is shifted on the plate | One piece was moved, rotated or scaled alone, or the STL pair was imported as two unrelated objects | Undo, or re-import. Select both pieces and move them together. With the STL ZIP, load both files as one object with two parts |
| The whole model previews in one color | No filament assigned per piece, only one filament slot in the project, or a slicer that ignores stored colors | Assign a filament to each piece, make sure the project has two filament slots, or use the STL ZIP. On a one-spool printer this is expected: use the manual change |
| The dark color is on the base and the light color is on the QR | The filaments were swapped | Reassign them: the lighter filament on the base, the darker on the QR |
| Streaks of the old color in the first dark layer, or a muddy code | Prime tower or wipe tower is off, or the manual purge was too short | Turn the tower back on. On a manual change, push more filament through before you resume |
| The code is half light, half dark, or the first dark layer also covers the base | The color change is at the wrong layer | Recalculate with the table above and confirm in the layer preview that the first dark layer holds only modules |
| The model looks 25 times too small or too large | An STL has no units, and the slicer guessed inches instead of millimeters | Accept the unit prompt for millimeters, or scale the whole model (both pieces together) by 25.4 or by 1/25.4 |
After any fix, run the checks in Will your 3D-printed QR code scan? and, if the finished print still does not read, go through Why a 3D-printed QR code won't scan.
Frequently asked questions
Do I need a Bambu AMS to print the 3MF?
No. An AMS or a similar system makes the color change automatic, but any printer that can pause at a layer can print the keychain or the wall plaque with one manual filament change, and any printer can print one color and add the dark color with paint afterward.
Why does my whole model appear in one color?
Some slicers only apply stored colors on request. Check the object list, assign a filament to each part, and make sure your project has at least two filament slots. On a one-spool printer a single color is expected, and you add the second color with a manual filament change.
Is it safe to open a 3MF file?
A 3MF is an open, zipped format made of XML and mesh data, and slicers read it routinely. As with any download, open it in a slicer you trust.
Which format should I choose if I am unsure?
Try the 3MF first. If your slicer does not show two separate parts, download the STL ZIP and assign the colors yourself.
Which layer do I change filament on for a 3.0 mm keychain?
With a 0.2 mm first layer and 0.20 mm layers, layer 15 is the last base layer and ends at 3.00 mm, so the color change goes after layer 15. For the 3.2 mm wall plaque with 0.20 mm layers it is layer 16.
Can I use a single filament change on the table stand?
No. The QR face of the stand is tilted 38 degrees, so a change at one height would cut across the code. Use an AMS or MMU, or print one color and paint the raised code.
Try it in the tool
Put this guide into practice with these free tools:
- Printer guide: pick Bambu AMS, Prusa MMU or a single color, and see the filament-change steps
- Size calculator: check the module size before you slice
- Keychain template, Wi-Fi plaque template and table stand template: each page has a “Use this template” button that opens the tool already configured
Make your own 3D QR code
Download the two-color 3MF or the STL pair and try the method that matches your printer.
Open the free tool